Python as a programming language has picked up pace, and is almost becoming a de-facto choice for engineers across many domains, and testing is indeed one of them. For a long time Selenium has supported Python implementations, and over recent years there has been a surge in demand for the skill set. The reason is primarily allocated to the immense set of rich python libraries and its vast usage across many organizations in various fields. More on this is discussed here – https://cpsat.agiletestingalliance.org/2021/02/10/why-use-python-for-selenium/
If you are a user of Selenium using a programming language like Java or C# you may find the syntax and various other tasks performed in these compiler languages differently than in Python which is interpreted. The syntax of Python is much simpler, and sometimes due to oversimplification and vast number of modules available for the same task, there could be complexity which could be faced by the novice and experienced engineers of test.
Recently at the #SeleniumSummit21, conducted by Agile Testing Alliance, https://seleniumsummit21.agiletestingalliance.org/, Aditya Garg took a lab session on setting Selenium Grid using Docker, and then went on to use Docker compose. So in this article I have explained how we can create few test scripts using pytest, setup the grid environment using docker compose and then execute the tests in parallel. This all is done using Python as the language. If you wish to learn how to do the same using Java, please visit this amazing lab session by Aditya – https://www.youtube.com/watch?v=WlFNfovWhvc&feature=youtu.be
TOOLS AND TECHNOLOGY
The details of the tools and technology used while creating this article are listed here –
Python version -3.8 you can use the latest one – https://www.python.org/downloads/
Docker Version – 20.10.2
The VnC viewer I have used is Tight VnC- https://www.tightvnc.com/
And the docker for this article is installed on the windows 10, home edition, for more help you can refer to the link – https://docs.docker.com/docker-for-windows/install-windows-home/
And I have installed the pytest-xdist module using pip. The command for it would be –
pip install pytest-xdist
This would allow us parallel execution. More details on it are available here – https://pypi.org/project/pytest-xdist/
Creation of PyTest for Chrome
import pytest from selenium import webdriver def test_login_chrome(): driver=webdriver.Remote( command_executor=”https://localhost:4444/wd/hub”, desired_capabilities={ “browserName”: “chrome”, }) driver.get(“https://www.5elementslearning.dev/demosite/”) driver.find_element_by_link_text(“My Account”).click() driver.find_element_by_name(“email_address”).clear() driver.find_element_by_name(“email_address”).send_keys(“abc@demo.com”) driver.find_element_by_name(“password”).clear() driver.find_element_by_name(“password”).send_keys(“demo@123”) driver.find_element_by_id(“tdb5”).click() driver.find_element_by_link_text(“Log Off”).click() driver.find_element_by_link_text(“Continue”).click() driver.quit()Creation of PyTest for Firefox
import pytest from selenium import webdriver def test_login_firefox(): driver= webdriver.Remote( command_executor=”https://localhost:4444/wd/hub”, desired_capabilities={ “browserName”: “firefox”, }) driver.get(“https://www.5elementslearning.dev/demosite/”) driver.find_element_by_link_text(“My Account”).click() driver.find_element_by_name(“email_address”).clear() driver.find_element_by_name(“email_address”).send_keys(“abc@demo.com”) driver.find_element_by_name(“password”).clear() driver.find_element_by_name(“password”).send_keys(“demo@123”) driver.find_element_by_id(“tdb5”).click() driver.find_element_by_link_text(“Log Off”).click() driver.find_element_by_link_text(“Continue”).click() driver.quit()In the above scenario, we are performing a login logout action on a website available at the url – https://www.5elementslearning.dev/demosite. Now experienced automation experts may note that this is not a test as it doesn’t have any assertions, but I take the liberty to exclude this step, but please feel free to add and modify this script to make it a test case.
SETTING GRID USING DOCKER COMPOSE
A simple google search will take you to many landing pages where docker and docker compose are discussed in great detail for setting of the selenium grid. I have found this link the most helpful – https://github.com/SeleniumHQ/docker-selenium/wiki/Getting-Started-with-Docker-Compose
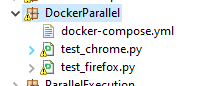
For the sake of simplification the chrome, and firefox scripts and the docker-compose.yml file are kept in the same folder.
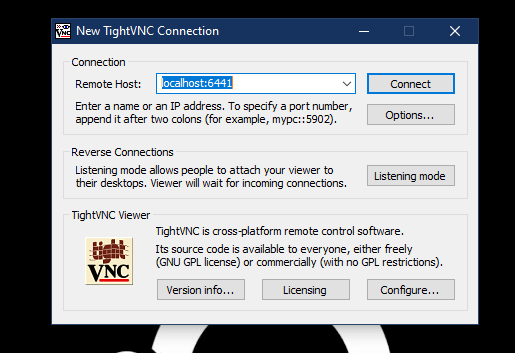
The default port on which hub will be listening is 4444, and to connect to the nodes using VnC viewer we will be using the port address as 6441, and 6442 respectively. The password is ‘secret’, and this is no longer a secret. Please note that I have used the debug versions of the chrome and firefox node as we would like to see the execution happening on the system. If you are new to the concept of containerization, maybe having a glimpse of this youtube video will help you – https://youtu.be/7hNHsYtyaU0
So as we are now all set, the following would be the order for execution
a. Using the docker-compose and the .yml file, we “UP” the grid environment
docker-compose -f docker-compose.yml up -d
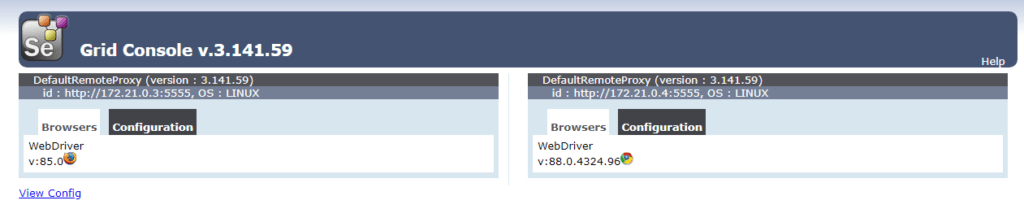
b. The next step is to check if the hub is running, for this you can open the browser with the url –
https://localhost:4444/grid/console
This should show you the following screen
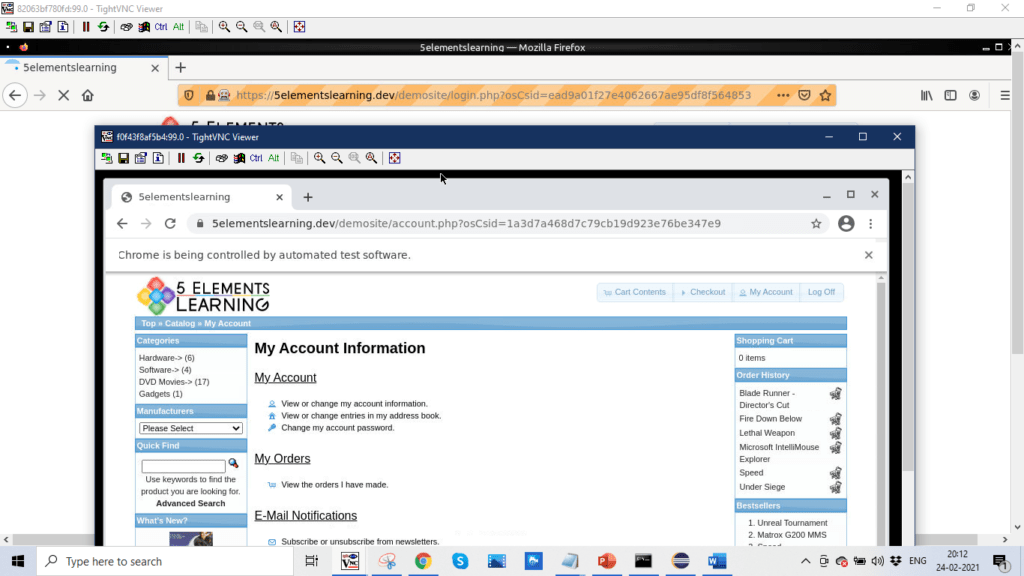
c. The next step is to use the VnC viewer to connect to the nodes which would now be listening on the
port- 6441, and 6442 respectively
d. Once we have reached this step, we are good for the final show. So we say abracadabra and pass on the
command
pytest -s -v -n=2
And we should be able to see the execution of the scripts in parallel.
e. After we are done, we can use docker-compose command to shut down the environment.
docker-compose -f docker-compose.yml down
CODE ON GITHUB
The above code files are available on the github url – https://github.com/pallavigitwork/pytestwithdockercompose
Hope you find this as a good starting point to your journey in learning parallel execution for scripts using docker, docker compose, selenium grid for python as a programming language. To know more about 5 elements learning, visit the website – https://5elementslearning.dev/, and to know more about Agile Testing Alliance upcoming events, do visit us at – https://ataevents.org/
For upcoming Selenium and Python Boot Camp Programs please visit the given URL:
https://cpsat.agiletestingalliance.org/#Events